Group Overview
This article will cover:
1. Creating Groups and using Invite Codes
Managing your Members will become easier as you start filtering them into groups.
You can create groups based on customers, fans, partners, media contacts, and employees. Perhaps you want a group for Members who you can ask to provide references or testimonials, or a group for those you met at a specific conference. It's really dependent on how you want to best utilize and organize your Hub. Members will not be able to see which groups they are added to.
Members can belong to more than one group, so your grouping can be as simple or complicated as you’d like. Later on, you'll be able to link challenges and rewards to certain groups.


In the Groups Tab page, Influitive comes with a few preset groups, such as Starter Group, Insider Group, Employees, and other level-based groups that you can add members too. These groups cannot be removed.
Additionally, when a Group is used in a Challenge's Targeting, you will not be able to delete the Group either. You would need to unpublished/archive the Challenge first in order to be able to remove the Group.

Note:
The invite Code can be any word or phrase that you think would best describe the Group. It's up to you, as the Administrator. It should be noted that the Invite Code will be public-facing, so it should be something that you would feel comfortable sharing with potential members. Having created an invite code, you now also have a custom URL which can be given to invitees to join your Influitive community through this group. You can find the Invite URL on the right side of the group page (see screenshot below). This URL can also be inserted into emails sent out via marketing automation platforms such as Marketo or Eloqua.
If an existing Hub member (while logged in) clicks on the Group Join URL link, their account will automatically be added to the associated group. This will only work if the Hub member is logged in.
If an existing Hub member is logged out of the Hub and clicks on the Group Join URL link, they will be directed to the Sign Up page. These users will need to enter with the same email address they've used to join the Hub initially. A different email address used will create a new Hub account.

2. Adding Members to Groups
There are three ways to add members to Groups:
- 2
- Manually adding members to a group
-
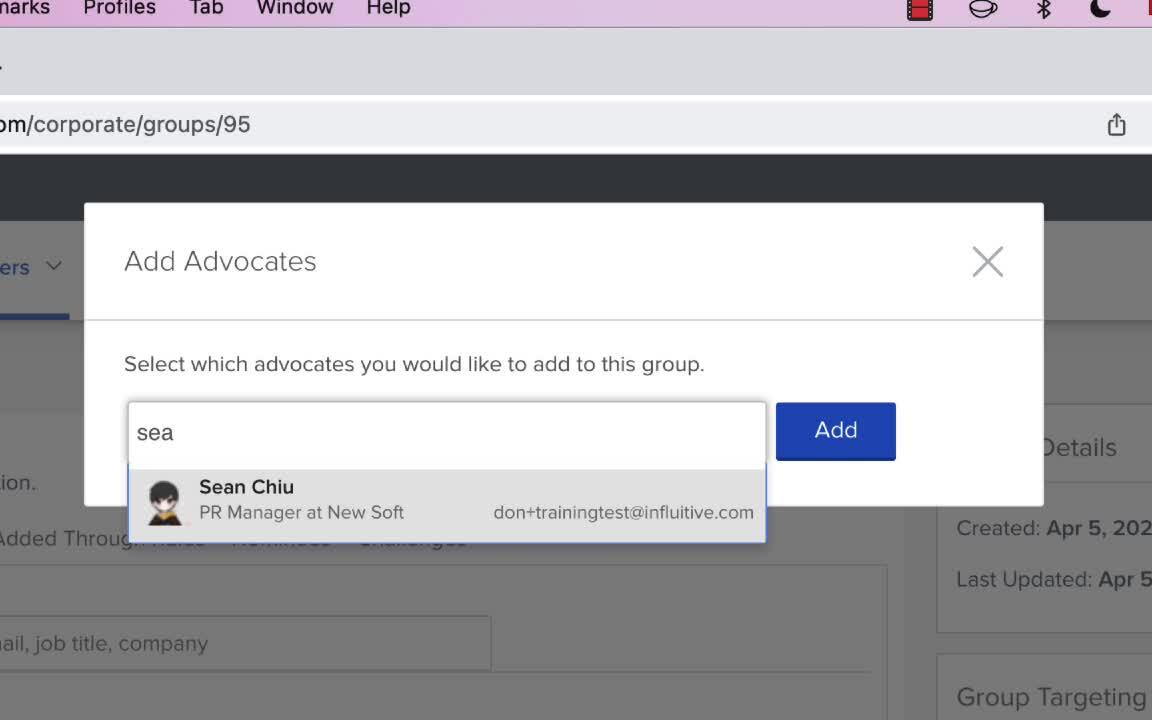
- While in the Groups tab of Admin View choose the group you'd like to add members to and click on the Add Advocates button.
-

-
Begin typing a name and you will see a list of matches. Click on the appropriate name or use your arrow keys to select and press
enter. You may choose as many members as you wish through this method.
-

- 3
-
Automatic addition through
membership rules
The targeting in the Group we made here together is set to Everyone under the Include Members section. When this selection is made, everyone in your hub will be included in this group. This is useful for the cases when you want to include every joined member except a few people or a specific group of people. You can find out how to exclude people in the next section. -

If you would like members who match specific criteria to be added to a group, check off the second option. You will also note the option to include members who meet all or any of the conditions from thedrop-down menu. -


Criteria for inclusion fall into five groups:
- Individuals: Search by name, email, title & add specific member(s)
- Groups: They are a member of one or more specific groups. It is not possible to include the Group you are editing in its own inclusion rules.
- Advocate Info: Criteria based on information about the member (e.g. Industry, Region, Title, etc.)
- Behaviour: How the member behaves in your hub (e.g. Engaged, Not Engaged, completed specific challenges, etc)
- Responses: Includes members based on their response to a question. You can choose to segment an exact response or a response that contains a certain word.
For each rule you enter, you will see the number of members found in your hub who match the criteria. 
3. Excluding/Removing Members from Groups
If you would like to exclude some members who may be included in the rule you created above, you can do this in the Exclude area - Exclusion rules are set up in the same manner as inclusion criteria, but require at least one inclusion rule to be in place first.
In the example above, we have included members in Canada. We can now exclude all Torontonians from this group. After you have finished filling out all include and exclude criteria, you will see a list of those who match these criteria to the right side as seen below.

- 2
-
Removing Members from Groups
You can head over to the Member's full profile > Groups Tab > Click on the ' x' mark to remove the Group.
-


The member is added back to the Group even after I have already removed the Group from their profile. Why did this happen?
The Group targeting will supersede this removal method so please make sure to check the Group's targeting rules so that the system will not add them back into the Group again after you've removed them.
4. Anatomy of a Group
On the right side of the page, you will see the details of the group - such as when it was created, last updated, member count, and inclusion rules. If you have added an Invite Code to the group, you will see the Invite URL on the right sidebar.

Group Tabs
On each group page, you will be presented with four tabs - Manually Added, Added Through Rules, Nominees, and Challenges. Let's look into what is included under each of them:
The Manually Added tab: Here is where you'll find the members you added in through their profile.

The Added Through Rules tab: This is a list of all members who meet the targeting criteria you've set for this group.
 The Nominees tab: When you add a nominee, you have the option to add them to a group. If you have done so, they will appear under the nominees tab of the appropriate group(s). Once you invite that nominee into Influitive they will appear under the Members list with a Not Joined flag. While they exist in the nominees list, they will appear under this tab. You can check out this article to learn more about nominating people: Nominee Management.
 The Challenges tab: Here you can see which challenges are targeted at this group. You can learn more about targeting challenges in this article: Challenge Targeting Overview.
